Decking Delights - Upcycled Veggie Boxes
Only have solid surfaces in your outdoor space (decking, paving, concrete), but want to grow food? The answer... Up-cycled Packing Crate Veggie Boxes.
Breanna Parker
4/18/20255 min read
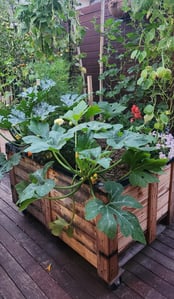
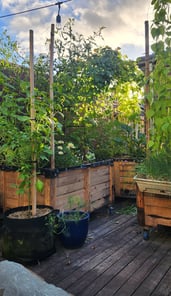
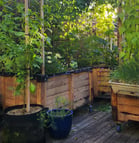
Like many suburban dwellers, a lot of my tiny yard is consumed by solid ground - in my case a decking. Whether it be decking, paved area, concrete, or the like, hard surfaces are no soil, and certainly wont grow any food. But in the eyes of this optimistic green thumb, a full sun and barely used area of decking was the perfect veggie patch. I just had to find a way to get vegetables to grow on the decking.
A little research had me stumble across a Facebook Marketplace add for used timber packing crates - you'd be surprised how easily and cheaply you can get your hands on one (or three) of these. I managed to grab mine locally for $25 each - bargain! From there, my creativity flowed! Below is the process to transform these ordinary timber boxes into sturdy, weather resistant, and flat out fabulous veggie boxes.
Materials (& I've even linked them for you);
Second hand packing crates (try Facebook Marketplace)
Step 1 - Height Adjustment
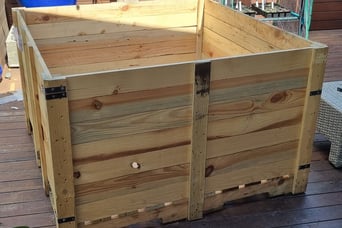
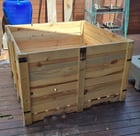
For most timber creates I've spotted online, the height is unnecessarily tall for our purpose - you could leave them if you wanted, but bare in mind the overall weight when full (especially on a raised decking) and the cost of filling them with that much soil.
So, I simply unscrewed the corner brackets off the top of the boxes, re screwed them back on lower down to the height I wanted them, and then cut off the timber rows above that lowered bracket. The height can be adjusted to your preference, as long as the plants have minimum 50cm of soil.
Two - Weather Proof
Being outside in the elements, I wanted these to last longer than one growing season, but I also needed to consider that food would be grown in these boxes and chemicals are therefore a big no no. I opted for a natural food safe option to seal the outside timber - Linseed Oil. Simply use a rag or paint brush and lather generously so the timber can soak in all the oily goodness. I did this twice. I then gave the boxes a few days of sitting in the sun to cure before moving to the next step.
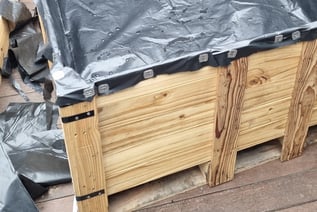
Three - Lining
We all know that timber over time will rot, especially when in contact with wet soil. To extend the life of these boxes I opted to line the inside with plastic - again, food safe materials should be used to ensure the safety of those eating the deliciousness that will be harvested from the boxes. Do some research into the different types of plastic, what the different levels of food grade safety are, and what you feel comfortable using. I then used foil tacks to quickly and easily attach the liner to the inside of the timber boxes.
TIP: keep the plastic as one big sheet and fold it in the corners, as a pose to cutting and attaching individual pieces - this will create a far better seal and protection for the timber. I also took the plastic all the way to the top of the sides and folded it over the top edges.
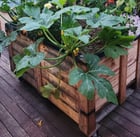
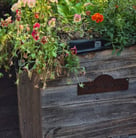
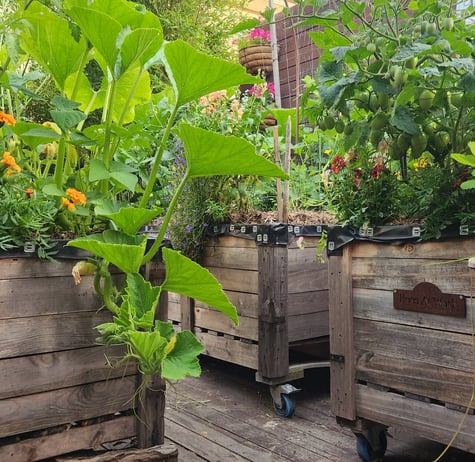
Four - Legs
A little elevation off the ground is a good idea for these boxes. Water will run through and out the bottom, so you want it to be able to drain and move freely away from the boxes. You could use heavy duty caster wheels, bricks, logs, etc. Again, the preferred overall height is up to you and your preferences.
Five - Drainage
As all gardeners know, this is everything! I knew I had to get this right, and there were definite trial and errors made at this stage before finally finding a combination of materials that created free drainage. I used a large (like 1cm diameter large) screw to stab (yes, very technical) heaps of holes in the bottom of the plastic in between the rungs of timber that line the bottom (the bases are not solid like the sides, but have about 4cm gaps between each plank). If the base of your box is solid, just remove every second plank so that you have some of the plastic not directly on top of timber.
After sufficient holes were created and I could see the water draining quickly and freely (hose test), I filled the bottom of each box with a large bag of untreated tan bark. Alternatively you could use something like crushed rock or scoria, but I needed to be very mindful of the overall weight due to being on my decking. If you were on concrete or pavers, the overall weight would not be a concern, so just go with what ever will be cheapest and easily accessible.
The point of this layer is to enhance drainage and lift the soil level a bit higher. If soil was to go directly onto the plastic with the holes, it is highly likely the soil would clog the holes and leave your plants sitting in water (this would be bad!)
Six - Separation
The final construction stage before filling with soil is to cover the tan bark (or alternative material of choice) with one layer of Geotextile Fabric. This will prevent the soil mixing with and filling the gaps within the drainage layer, and ultimately destroying the perfect drainage system you just created. This was the biggest OOPS moment we had when building these, learning quickly that soil straight onto the bottom layer stops quick and easy drainage. Using Geotextile Fabric was the perfect solution, as water seeps through this material perfectly, but keeps the two layers seperate.
& Finally...
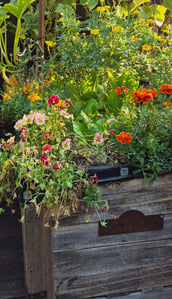
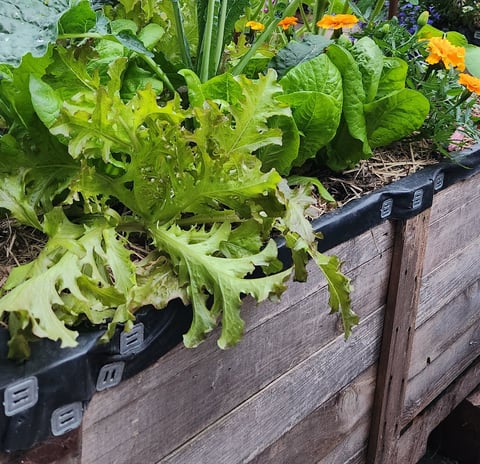
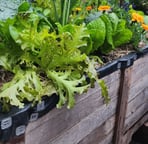
Add your soil! BOOM, that's it! Now you have plenty of growing space to produce your own homegrown goodness, regardless of the surfaces you are dealing with in your backyard.
I'd LOVE to see some photos if you give this a crack - and I truly hope you do give it a go. It really is a simple process and the product works - the proof is in my veggies!!
Happy Growing (& constructing)!